Requirements.
The article is valid for Windows 2000/XP.
Information.
If you do not understand why the panel disappeared " Quick launch", it can be restored in three proven ways.
Installing the Quick Launch panel.
1st way.
1. Right-click on the "Start" button and select the menu item " Properties";
2. In the "Taskbar and Start Menu Properties" window, click the " Task bar";
3. Check the box " Show quick launch bar"if she's not worth it;
2nd way.
Toolbars";
2. In the expanded list, find the name " Quick launch" and click on it with the left mouse button to turn on the panel;
3rd way.
1. Right-click on the taskbar (in a place free from windows and buttons) and select the menu item " Toolbars";
2. In the expanded list, find " Create Toolbar" and click on it with the left mouse button;
3. In the opened window " Create Toolbar" in the "Folder" field, enter:
C:\Documents and Settings\admin\Application Data\Microsoft\Internet Explorer\Quick Launch
where:
C is the name of the drive on which the Windows operating system is installed.
admin - your username
4. Click "OK";
5. A new panel called " Quick Launch", with button " >>
";
Now we bring it to the standard form.
6. Right-click on the taskbar in an empty space and uncheck " Pin the taskbar" if it is installed;
7. Right click on our panel name and uncheck " Show captions" and " Show title";
8. Squeeze the panel by the dividing strip if the panel is stretched to the entire taskbar;
"Control Panel" one of the most important components of the operating Windows systems and its name speaks for itself. With the help of this tool, you can directly manage, configure, run and use many system tools and functions, as well as troubleshoot and troubleshoot various problems. In our article today, we will tell you what are the ways to start "Panels" in the latest, tenth version of the OS from Microsoft.
Run window
Launch option described above "Panels" can be easily reduced by one step by eliminating "command line" from the action algorithm.

Method 2: Search function
One of the distinguishing features of Windows 10, when compared this version The OS with its predecessors has become a smarter and more thoughtful search system, endowed, moreover, with a number of convenient filters. For start "Control Panels" you can use both a general search throughout the system and its variations in individual system elements.
System search
By default, the Windows 10 taskbar already displays a search bar or search icon. If necessary, you can hide it or, conversely, activate the display if it was previously disabled. Also, a combination of hot keys is provided to quickly call the function.

"Parameters" of the system
If you often refer to the section "Options", available in Windows 10, you probably know that there is also a quick search option. By the number of steps performed, this opening option "Control Panels" practically does not differ from the previous one. Moreover, it is likely that over time "Panel" will move to this particular section of the system, or even be completely replaced by it.

Start menu
Absolutely all applications, as originally integrated into the composition operating system, and those that were installed later can be found in the menu "Start". The truth that interests us "Control Panel" hidden in one of the system directories.

Adding a Control Panel Icon for Quick Access
If you are often faced with the need to open "Control Panels", obviously it would be useful to fix it "at hand". There are several ways to do this, and which one to choose is up to you.
File Explorer and Desktop
One of the simplest, easy-to-use options for solving the task is to add an application shortcut to the Desktop, especially since after that it will be possible to launch it through the system "Conductor".
- Go to the desktop and right-click in its empty area.
- In the context menu that appears, go through the items one by one "Create" — "Label".
- In line "Specify the location of the object" enter the command already familiar to us "control", but only without quotes, then press "Further".
- Give the shortcut a name. The best and most understandable option would be "Control Panel". Click "Ready" for confirmation.
- Label "Control Panels" will be added to Work Windows table 10, from where you can always launch it by double-clicking LMB.


For any shortcut that is on the Windows Desktop, you can assign your own key combination, which provides the ability to quickly call. Added by us "Control Panel" is no exception to this simple rule.


Start menu
As we have previously indicated, find and open "Control Panel" can be through the menu "Start" by referring to the list of Windows utility applications. Directly from there you can create the so-called tile of this tool for quick access.
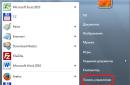
- Open the menu "Start", by clicking on its image on the taskbar or using the corresponding key.
- Find a folder "Utilities - Windows" and expand it with LMB click.
- Now right click on the shortcut "Control Panels".
- In the context menu that opens, select "Pin to Home Screen".
- Tile "Control Panels" will be created in the menu "Start".


If you wish, you can move it to any convenient place or change the size (the screenshot shows a medium one, a small one is additionally available. 
Task bar
Open "Control Panel" most fast way, with a minimum of effort, you can if you first pin its shortcut to the taskbar.

This is how you can easily ensure the fastest and most convenient opening "Control Panels". If you really often have to access this section of the operating system, we recommend that you choose the appropriate option for creating a shortcut from those described above.
Conclusion
Now you know about all available and easy-to-implement ways to open "Control Panels" in a Windows 10 environment, and how to make it the fastest and most convenient to start by pinning or creating a shortcut. We hope this material was useful for you and helped you find a comprehensive answer to your question.
I really like the quick launch bar and still use it on all the computers where it is installed - for example, on the workstation on which I am writing this article. But I like it just as much and perfectly replaces the quick launch bar - at least for me. However, a rather vociferous minority of users are vocal in their outrage at the disappearance of the quick launch bar from the new Microsoft OS, so in this article I will tell you how to get it back.Repairing the Quick Launch
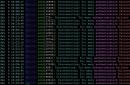
On fig. A is shown on one of my test computers. As you can see, there is a taskbar on it, but there is no quick launch bar.
Figure A The taskbar is there, but the quick launch bar is not.
Right-click on an empty area of the taskbar to bring up the context menu shown in Fig. B. Uncheck "Lock the taskbar" and select the menu item "Panels | Create Toolbar" (Toolbars | New Toolbar).

Figure B Select the Create Toolbar menu item.
The New Toolbar - Create a Folder dialog box will appear, as shown in Figure 1. C. Click on the address bar, paste the address below into it without changing anything, and press the key:
%appdata%\Microsoft\Internet Explorer\Quick Launch

Figure C Enter the specified address in the address bar.
The path shown in Fig. D. To complete the creation of the Quick Launch bar, click the Select Folder button.

Figure D Notice the path in the address bar.
After that, the quick launch bar should appear on the taskbar (Figure E). It may need to be slightly edited depending on your preferences.

Figure E The taskbar now has a quick launch bar.
I prefer the quick launch bar to be all icons, no labels, so I suggest you right-click on it (Figure F), turn off the Show Text and Show Title options, and then choose a large icon size.

Figure F. Changing the appearance of the quick launch bar.
On fig. G shows the Windows 7 desktop, which has both a taskbar and a quick launch bar.

Figure G The desktop now has both a taskbar and a quick launch bar.
Please note - on my test computer, the Quick Launch bar contains Outlook 2010 icons by default,
Has the toolbar disappeared in Microsoft Word? What to do and how to get access to all those tools without which working with documents is simply impossible? The main thing is not to panic, as it disappeared, it will return, especially since finding this loss is quite simple.
As they say, everything that is not done is for the best, so thanks to the mysterious disappearance of the quick access bar, you can learn not only how to return it, but also how to customize the elements that appear on it. So let's get started.
If you are using Word 2012 and higher, you only need to press one button to return the toolbar. It is located in the upper right part of the program window and looks like an upward arrow located in a rectangle.

Press this button once, the disappeared toolbar returns, press again - it disappears again. By the way, sometimes it really needs to be hidden, for example, when you need to completely and completely concentrate on the content of the document, and so that nothing extra is distracting.

This button has three display modes, you can choose the appropriate one just by clicking on it:
- Automatically hide the ribbon;
- Show only tabs;
- Show tabs and commands.

The name of each of these display modes speaks for itself. Choose the one that is most convenient for you while you work.
If you are using MS Word 2003 - 2010, you must perform the following manipulations to enable the toolbar.
1. Open the tab menu "View" and select the item "Toolbars".
2. Check the boxes next to the items that you need to work.
3. Now all of them will be displayed on the Quick Access Toolbar as separate tabs and/or groups of tools.
Enabling Individual Toolbar Items
It also happens that “disappears” (is hidden, as we have already figured out) not the entire toolbar, but its individual elements. Or, for example, the user simply cannot find any tool, or even an entire tab. In this case, you need to enable (configure) the display of these same tabs on the Quick Access Toolbar. You can do this in the section "Options".
1. Open a tab "File" on the Quick Access Toolbar and navigate to "Options".

Note: In earlier versions of Word, instead of a button "File" there is a button "MS office".
2. In the window that appears, go to the section "Customize Ribbon".

3. In the Main Tabs window, check the boxes next to the tabs you need.

- Advice: By clicking on the plus sign next to the tab name, you will see lists of tool groups that these tabs contain. Expanding the "pluses" of these items, you will see a list of tools presented in groups.
4. Now go to the section "Quick Access Toolbar".

5. Section "Select commands from" select item "All Teams".

6. Go through the list below, finding the necessary tool there, click on it and click the button "Add" between windows.

7. Repeat the same step for all other tools that you want to add to the Quick Access Toolbar.
Note: You can also delete unwanted tools by clicking the button "Delete", and sort their order using the arrows located to the right of the second window.
- Advice: In chapter "Customizing the Quick Access Toolbar", located above the second window, you can choose whether your changes will be applied to all documents or only to the current one.

8. To close the window "Options" and save your changes, click the button "OK".
Now on the quick access panel (toolbar), only the tabs you need, tool groups and, in fact, the tools themselves will be displayed. By properly configuring this panel, you can noticeably optimize your working time, increasing your productivity as a result.