Often there is a situation where correct connection router or modem to a PC in the lower corner of the computer monitor there is no "windows 7 wireless network connection" icon. And no matter how much the user switches wires, stubborn "network connections" never appear. In this case, it is necessary to postpone the “cable work” for a while and check (and possibly reinstall) the LAN connection settings.
Windows 7 network connection setup
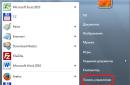
- 1. Click the left mouse button (then all the time with the left, unless otherwise indicated) the Start menu button.
- 2. Select the "Control Panel" icon.
- 3. In the "Control Panel" click "Network and Internet" - "View network status and tasks" (if you do not see it, switch the view mode to the "Category" view).
4. Go to the "Change adapter settings" menu.

5. Right-click on the "Local Area Network Connection" icon, select "Properties" from the context menu.

6. Double-click to expand the properties of "Internet Protocol version 4 (TCP / IPv4)".
7. We switch the first checkbox to the position: “Obtain an IP address automatically”, the second to “Obtain a DNS address of the north automatically”.

8. If the checkboxes were already in the specified position, then change the first one to the position: “Use the following IP address”.
Set the following values: "IP address": 192.168.1.2, "Subnet mask" 255.255.255.0, "Default gateway": 192.168.1.1; "Preferred DNS server': 192.168.1.1.

Do not forget to click the "OK" button in all open windows after the settings are completed to save the settings.
Setting up a network connection in windows 8:
In general, setting the connection parameters here is carried out similarly to the previous version of the OS. The only caveat: many users do not know how to open network connections in windows 8. Therefore, at this stage, we will dwell in more detail:
1. Right-click on the "Start" menu and in the menu that appears, select "All applications"

2. In the "Applications" menu, click the "Control Panel" icon.

3. Click on the "Network and Internet" icon.
5. Find and click "Change adapter settings" (top left).
Further configuration is carried out similarly to the "seven": follow steps 5 to 8 and check the network connection - the corresponding icon should appear in the lower corner of the monitor.
Good day!
Eh, if in the 90s of the last century a computer was a luxury, now many people have not one, but several computers / laptops at home. If you connect computers to local network(in which there will even be only 2 devices), you can get undeniable advantages:
- the ability to open files located on another PC, work with them, etc. Now you do not need to run back and forth with a flash drive or disk;
- the ability to make a network printer (scanner, CD / DVD drive, etc.), and use it from all PCs in the local network;
- the ability to play network games (this is a separate and most interesting opportunity, which can be talked about for a long time).
In this article, I wanted to consider the issue of building a home local network (and setting it up), which will be useful to all novice users. I will follow the path of step-by-step analysis, I will start with the question of connecting one PC to another, then I will consider Windows setup, and how, in fact, to share (make available to the local network) folders, printers, etc. So...
When creating a home local network, most often, two options are used:
- connect two computers (PC to laptop, PC to PC, etc.) using a cable (it is often called twisted pair);
- get a special "box" called a Wi-Fi router. A PC is connected to the router using a network cable, and laptops, phones, tablets, etc. devices get Internet access via Wi-Fi (the most popular option today).
Option number 1 - connecting 2 PCs using twisted pair
Pros: simplicity and cheapness (you need 2 things: a network card, and a network cable); providing a sufficiently high speed that not every router is able to issue, a smaller number of radio waves in the room.
Cons: extra wires create confusion, get in the way; after reinstalling Windows OS - network setup is required again; for Internet access to be on the second PC (2), the first PC (1) must be enabled.
What is needed: that each PC has a network card, a network cable. If you plan to connect more than 2 PCs to a local network (or if one PC is connected to the Internet and is on the local network at the same time), one of the PCs must have 2-3 or more network cards.
In general, if both PCs have network cards, and you have a network cable (also called an Ethernet cable) - then connecting them with it is not difficult. I don't think there is much to consider here.
Note: Please note that network cards usually start to turn green (yellow) LED when you connect a cable to it.

Another important point!
Network cables for sale are different: and not only in color and length. The fact is that there are cables for connecting a computer to a computer, and there are those that are used to connect a PC to a router.
For our task needed crossed network cable (or cable pressed in a cross way- here who calls it).
In a crossover cable - on the end connectors, the yellow and green pairs are reversed; in the standard (for connecting a PC to a router) - the colors of the contacts are the same.

In general, if two PCs are turned on, working, you connected them with a cable (the LEDs on the network cards blinked), the network icon next to the clock stopped displaying a red cross - that means the PC has found the network and is waiting for it to be configured. This is what we will do in the second section of this article.
Option number 2 - connecting 2-3 or more PCs using a router
pros : most devices: phones, tablets, laptops, etc. will have access to WiFi networks; fewer wires "underfoot", after reinstalling Windows- Internet will work.
Cons: purchase of a router (after all, some models are far from cheap); "complicated" device setup; router radio waves ., lower ping and freezes (if the router can not cope with the load).
What you need: a router (it usually comes with a network cable to connect one PC to it).
With the connection of the router, as a rule, there are also no big problems: the cable coming from the Internet provider is connected to the special. router connector (it is often called "Internet"), and local PCs are connected to other connectors ("Lan-ports"). Those. the router becomes an intermediary (an example diagram is shown in the screenshot below. By the way, in this diagram there may not be a modem on the right, it all depends on your Internet connection) .

By the way, pay attention to the LEDs on the router case: when you connect the Internet cable from the provider, from the local PC, they should light up and blink. In general, the setting WiFi router- this is a separate big topic, besides, for each router - the instructions will be slightly different. Therefore, it is hardly possible to give universal recommendations in one single article ...
By the way, when connecting through a router, the local network is usually configured automatically (that is, all computers connected via a network cable should already be on the local network, there will be a couple of small touches (about them below)). The main task after that is to set up a Wi-Fi connection and access to the Internet. But since this article is about the local network, I do not focus on this ...
LAN setup (Windows 7, 8, 10)
In this subsection of the article, I will give universal instructions, regardless of how your local network is organized: connected via a network cable, or using a router. Where the settings will relate to a specific option - there will be notes.
Note: all settings are relevant for Windows 7, 8, 8.1, 10.
Computer name and workgroup
Allegory: each person has his own name, surname, patronymic, date of birth, city, etc. - No two people are the same. It is the same in the network - there should not be computers with the same name ...
The first thing to do when setting up a local network is to check and configure workgroup name and computer name. Moreover, you need to do this on each computer in the local network!
To find out the computer name, open the panel Windows controls by the address: Control Panel\System and Security\System (screen below). Next, make sure the following:
- PC name and slave. the group must be in Latin;
- each PC / laptop in the local network should have its own unique name(for example: PC1, PC2, PC3);
- Every PC/Laptop should have same working group (for example: WORKGROUP).
To change the name and working group - click the "Change settings" button.


Change workgroup and PC name
In general, when you bring all the names in accordance with the requirements above, you can proceed to the next step of the setup.
Turn on printer and folder sharing
Relevant for connecting through a router, and directly ...
This innovation appeared in Windows 7, supposedly provides more security for the OS (in my opinion, it only creates the need for additional local network settings). The bottom line is that, by default, Windows blocks and does not allow access to open and share folders, a printer, etc., until the security policy is "softened".
To remove this lock and enable sharing, you need to:

Setting up IP addresses, DNS, masks, gateways
For a network organized using a router
In general, for PCs connected to a local network using a router, usually nothing needs to be configured (everything works by default). If something is wrong, just in case, I recommend that you go in and check the connection properties.
To do this, you first need to open "network connections" . This is done simply:
- first open the window "Run"- combination of buttons Win+R;
- then enter the command ncpa.cpl and press Enter(works in all Windows versions 7, 8, 10).

How to open network connections // ncpa.cpl

Local Area Connection Properties

To connect PC to PC via network cable
PC 1
By PC 1, I mean a computer that has two network cards: one of them is connected to the ISP's Internet cable, and the second is a local network cable that goes to PC 2.
Note: although, the Internet cable from the provider does not have to be. If it is not there, choose PC 1 and PC 2 - arbitrarily ...
And so, we open network LAN connection properties(how this is done - see a little higher in the article).
- IP address: 192.168.0.1;
- subnet mask: 255.255.255.0 (see screenshot below);
- save your settings.

AT properties of IP version 4 (TCP/IPv4) second PC, you need to set the following parameters:
- IP address: 192.168.0.2,
- subnet mask: 255.255.255.0;
- default gateway: 192.168.0.1;
- preferred DNS server: 192.168.0.1 (see screenshot below);
- save your settings.

Actually, the local network setup itself is finished. Now you can proceed to the most interesting part - sharing and using the shared resources of the local network. Exactly what we were going for...
Sharing Internet access on a second PC
Relevant for PCs connected directly by LAN cable...
You need to configure PC 1 (i.e. the one to which we have the provider's Internet cable connected).
First we open network connections : press combination Win+R, enter ncpa.cpl, Further Enter .
How to open network connections //ncpa.cpl

Next, open the tab "Access", and check the box next to "Allow other network users to use this computer's Internet connection" . Save your settings.

Allow other users to access the internet
If everything is done correctly, the Internet will be on both computers.
Note: of course, for the Internet to be on PC 2 - PC 1 must be turned on! This, by the way, is one of the inconveniences of such a local network, when connected through a router - the Internet will be regardless of which PC is on / off.
Sharing folders/files for public access


3) Set the resolution: read or read and write.
Note:
- allowed to read: users can only copy your files to themselves (neither delete nor change - they can't!);
- read and write allowed: LAN users will receive full control over files to folders: can delete all files, change any of them, etc. In general, I would not recommend giving such access to important and large folders (to transfer files, it is better to have a separate folder, to which you give full access).


5) After a few seconds, Windows will report that the folder has been shared. So everything went well.

6) To access the folder:
- open the explorer;
- then open the "Network" tab (on the left, at the bottom of the window);
- open computer name, on which the folder was shared. As you can see in the screenshot below, it is shared, you can go into it and start copying (reading) any files.

Printer sharing (shared network printer)
1) The first thing to do is open the control panel: control panel/hardware and sound/devices and printers.
3) Then open the tab "Access" and check the box "Sharing this printer" . Save the settings (see screenshot below). Actually, now the printer is shared and it can be used by other PCs / laptops / tablets and other devices on the local network.

How to share a printer
4) To connect a network printer, open conductor, select computer name , on which the printer is shared. Next you should see it: click on it right mouse button and select the option from the menu connections .

How to connect a network printer
5) Then you can open any document, press Ctrl+P (File/Print), and try to print a friend page.
Note: By default, Windows typically lists a different printer (not the one you have connected over the network). Do not forget when printing - change it.
Regarding the local network printer - I recommend that you read my detailed article on this topic. It covers some of the points in more detail. Link below.
"Creating" a network printer -
I am finishing the article on this. Good luck and fast setup.
Setting up a local home network can be divided into several steps:
1 Prescribe network settings on all computers / laptops / TVs on your home network (this step is used if there is no router on your local network).
2 Checking the name of computers and the working group specified in the properties of computers.
3 Enable Windows Firewall.
4 Check network operation.
We manually write the network settings on all devices on the home network (for networks that do not have a router / router)
Go to Control Panel (" Start - Control Panel”) and choose “ Network and Sharing Center».
After that, press " Change adapter settings». 
In the network connections window, select the connection we are interested in and right-click on it, select " Properties”, in the connection properties window, select “ Internet Protocol Version 4 (TCP/IPv4)» and press the active button « Properties". In the Internet Protocol Version 4 (TCP/IPv4) Properties window, enter the IP address 192.168.1.1
(on other machines we prescribe 192.168.1.2
, 192.168.1.3
etc.) All computers must have a subnet mask 255.255.255.0
. The gateway should not match the IP address of the computer; in the gateway, enter the IP of another computer on the network (if you do not have a gateway specified, you will not be able to specify the network, by default it will be Public, this will be discussed below). 
The first time you connect to a network, you must select a network location. This choice affects the firewall settings and security settings for the type of network you are connecting to. If your computer connects to more than one network (for example, your home network, your local coffee shop, or your work network), choosing a network location ensures that your computer is secure. 
There are four types of network placement.
home network to work in home networks or in networks whose users and devices are known and can be trusted. Home network computers can belong to a homegroup. For home networks, network discovery is turned on, which allows the use of other computers and devices connected to the network, and allows other users to access the computer from the network.
Working network to work in a network of a small office or other workplace. Network discovery, which allows you to use other computers and devices connected to the network, and allows other users to access your computer from the network, is enabled by default, but you cannot create or join a homegroup.
public network for networks in public places (such as cafes and airports). This network location is configured to make the computer "invisible" to other users and increase its protection against malware. software from the Internet. HomeGroup is not available on public networks and network discovery is disabled. This option should also be selected if you are using a direct Internet connection without a router or a mobile broadband connection.
Domain used for domain networks, such as those used in workplaces in organizations. This type of network location is controlled by the network administrator and cannot be selected or changed.
In practice, I would recommend choosing for a home network Working network, because unlike Home Network, you don't need to enter a password to share resources. Of course, you should not choose a Public network for a local network at home, I generally keep quiet about the domain, because in this case you need to install, configure a domain controller - for a home network - it's not worth it.
Checking the computer name and workgroup.
It is necessary to check that all devices on the home network are included in the same workgroup, while having different names. To do this, we go Start-Panel control- System
". A similar procedure must be performed on all computers / laptops in the network.  In the field Computer name, domain name and workgroup settings, we look at the registered computer name and workgroup.

Checking the operation of the Windows Firewall service.
The next step is to check if the Windows Firewall service is enabled. To do this, we go Start - Control Panel - Administrative Tools» 
In the window that opens, click " Computer management». 
Next go " Services and Applications - Services", find a service there Windows Firewall and see that it is enabled, if it is disabled, you need to run it and check that the Startup type is set to " Automatically”, To do this, double-click on this service and in the window that opens, look, and if necessary, correct the Startup Type. 
Checking network operation.
The last step is to check the operation of the home network, for this we launch the command line on one of the computers. Click " Start» in the search bar write cmd and press the key Enter». 
Will open command line, in it you need to enter the command ping and ip address of another computer on the home network, press the " Enter». 
If everything is done successfully, you should not have any packet loss.
This completes the home network setup, the next step is to configure network printer or do shared folders (network folders) This will be discussed in future articles.
Hello, friends! In this article, we will touch on network configuration in the operating room. Windows system 7. Namely, let's deal with home groups. This feature allows you to simplify the exchange of information between users on your home network. Here we will analyze the configuration of IP addresses for computers so that you can create a home group and configure network placement. Let's see how to create home groups, how to join them and, of course, how to share directories so that other users can work with them. We will also consider a place from where it is convenient to control the shared resources on . I hope that after reading this article, you will be able to easily set up a home network between computers running Windows 7.
Firstly In order for computers to work properly on the network, it is necessary to synchronize the time between them. All computers on the network necessary set current time and make it so.
Secondly. It is necessary to set the computers so that they are on the same network. This function is usually assigned to the router or router. Then it assigns an address from the specified range to each connected computer. If you do not have, then you need to configure the addresses manually.
This is done as follows
1. In the notification area, left-click on the icon Net. In the window that opens, click on the link Network and Sharing Centeraccess
In the Network and Sharing Center that opens, on the left side, click

In the window that opens, all network connections of your . Choose the connection through which you will connect to your home network. It could be a connection wireless network or else. Select it with the left mouse button and call the context menu with the right mouse button. Choose Properties

In the Network window that opens, we need to check the boxes for Client for Microsoft Networks, File and Printer Sharing for Microsoft Networks, and Internet Protocol Version 4 (TCP/IPv4). Select the last one and press the button Properties

In the properties of TCP / IP, select Use the following IP address. In the field, enter the address and subnet mask (for example, such as in the figure IP - 192.168.0.1 and subnet mask - 255.255.255.0)


In the window that opens, check the box Get the latest troubleshooting tools online

At Microsoft, a lot of people work so that we can fix common mistakes with this tool.
Now, when problems arise, not only with the homegroup, you can use the latest tools.
The homegroup has been created, the settings have been set. Now you need to connect the rest of the computers on the network.
On the computer that we want to connect to the Homegroup, this element

Since the group has already been created, we will be offered Join

We set the libraries that we want to make public and click Further

In the next window enter password to the homegroup and click Further

Successfully connected to the homegroup. In the same way we connect all other computers.
Setting up sharing
All that was above is the preparatory steps for the ease and simplicity of setting up network sharing.
You can share with homegroup users as follows. We open. We find and select folder to which we need to give access. On the toolbar, click the button General access and select from the drop down menu Home group (reading) or Homegroup (read and write) if you want users to be able to modify and delete files in this folder

Here you can deny access choosing None of the users. The folder icon will be marked with a padlock.

When you create or join a homegroup, the corresponding section appears in the navigation pane of the explorer window. From here it is convenient to access the shared folders of other computers on the network

After some time, you can forget which folders on your computer are shared. To remember, you can go through the network to your computer. It is convenient to do this using the Network item in the navigation menu

You can see, but it is not convenient to manage from here. There is a separate tool for this.
Run the utility Computer management

In the computer management window, on the left in the console tree, expand the item Shared folders and choose Shared Resources. The table in the center will display all your shared resources and here you can stop sharing any of them

From Shared Resources can open access. To do this, open the menu Action and choose New shared resource...

The Create Shares Wizard will open, following the instructions of which you will share the folder

By default, shared libraries are read-only. You can give access to the record from the explorer. Select the required library in the navigation area of the explorer, call the context menu and select Sharing and Homegroup (read and write)

In this simple way, you can open and deny access to the resources of your computer in the Windows 7 homegroup.
Conclusion
In this article, I hope I was able to explain in an accessible way how Windows 7 network setup. We set up computers to work on the same network, created a home group and learned how to give and block access to various computer resources. In principle, this should be enough. It remains only to add a few recommendations to ensure greater security when working on the network.
This article will show you how to share files between two Windows 7 computers. To do this, we will set up a network between the two computers using a LAN connection and share files and folders. For these purposes, you will need a crossover cable (crossover) and two computers with Windows 7.
1. Turn on "Sharing" in Windows 7
You need to enable "Sharing and Network Discovery" on both Windows 7 computers. To do this, go to " Control Panel" > "Network and Internet" > "Network and Sharing Center" > "Edit add. sharing options". In the window that opens for changing sharing settings, enable the following items:
Network discovery
File Sharing
Sharing public folders

2. Name the computer and create a workgroup
Click Start, right click on Computer, select Properties. - in the "Computer name, domain name and workgroup settings" section, click "Change settings" - click the "Change" button - enter the name of the computer (computer names must be different)  - enter the name of the workgroup, for example "Home Network" (the workgroup names for both computers must be the same) - after applying all the settings, you will be asked to restart the computer. Click OK to reboot.
3. Assign IP addresses to computers
Open Control Panel > Network and Internet > Network and Sharing Center - Open "Local Area Connection Properties" and select "Internet Protocol Version 4 (TCP/IPv4)"  - click Properties, then select "Use the following IP address" and enter, for example, 192.168.0.1. After entering the IP address, click on the empty Subnet Mask field, and it should be registered automatically.
  - enter the IP address for the second computer, for example 192.168.0.2 (IP addresses must be different)
4. Connect two computers with a crossover cable
After connecting, you should see the computers in "Network and Sharing Center". You are now all set to transfer files between the two computers.
Add-ons
To access a computer by its IP address (for example, 192.168.0.2), you need to enter \\192.168.0.2 in the address bar of the explorer and press Enter. (the same can be entered by pressing Win + R).  To check if there is a connection between computers, run cmd.exe and enter the ping 192.168.0.2 command (on the computer with the address 192.168.0.1). If there will be messages like: "Reply from 192.168.0.2...." - then the connection is established, and if "Request timed out." - then most likely there is no connection between the computers. If a password is not set on the computer (i.e. empty), then when you try to log in over the network, you may receive an error message:
\\COMPUTER is not accessible. You might not have permission to use this network resource. Contact the administrator of this server to find out if you have access permissions.
Logon failure: user account restriction. Possible reasons are blank passwords not allowed, logon hour restrictions, or a policy restriction has been enforced.
Therefore, when setting up a network in Windows 7, do not forget to also set a non-empty password on your computer. If someone asks for a password when entering another computer, then you need:
Enable "Sharing and Network Discovery" on both Windows 7 computers.
To do this, go to "Control Panel" > "Network and Internet" > "Network and Sharing Center" > "Change advanced sharing settings".
At the very bottom "Turn off password protected sharing"
That's all. Thanks for reading the article. I hope it was helpful to you.