The question of how to install Windows 7 yourself is one of the most common on the net. Although, in fact, there is nothing complicated here: installing Windows 7 is something that can be done once, using the instructions, and in the future, most likely, there should be no installation questions - you can not ask for help. So, in this guide, we will take a closer look at installing Windows 7 on a computer or laptop. I note in advance that if you have a branded laptop or computer and you just want to return it to the state in which it was, then instead of it you can simply reset it to factory settings. Here we will talk about a clean installation of Windows 7 on a computer without operating system or from the old OS, which will be completely removed in the process. The guide is perfect for beginners.
What you need to install Windows 7
To install Windows 7, you will need an operating system distribution kit - a CD or USB flash drive with installation files. If you already have bootable media, great. If not, then you can create it yourself. Here I will present only a couple of the most simple ways if for some reason they don't fit, full list You can find ways to create a bootable USB flash drive and boot disk in the "Instructions" section of this site. To make boot disk(or USB flash drive) you will need a Windows 7 ISO image.
By default, the vast majority of computers boot from hard drive, but to install Windows 7, we will need to boot from the USB flash drive or disk created in the previous step. To do this, go to Computer BIOS, which is usually done by pressing DEL or another key immediately after turning it on, even before the start Windows boot. Depending on the version and manufacturer of the BIOS, the key key may differ, but usually it is Del or F2. After you enter the BIOS, you will need to find the item responsible for the boot order, which can be located in different places: Advanced Setup - Boot Device Priority (boot priority) or First Boot Device, Second Boot Device (first boot device, second boot device - in the first item you need to put a disk or USB flash drive).
If you do not know how to set the boot from the desired media, then read the instructions (opens in a new window). For a DVD disc, this is done in a similar way. After completing the BIOS settings for booting from a USB flash drive or disk, save the settings.
When the computer restarts after applying the BIOS settings made in the previous step and the boot starts from installation media Windows 7, on a black background you will see the inscription Press any key to boot from DVD or an inscription of similar content on English language. Click it.

Language selection when installing Windows 7
After that, the download will take place for a short time. Windows files 7, and then the language selection window for installation will appear. Choose your language. At the next stage, you will need to set the input parameters, the time and currency format, and the language of the operating system itself.

After selecting the system language, the following screen will appear prompting you to install Windows 7. From the same screen, you can start System Restore. Click Install. Check out the terms Windows licenses 7, check the box stating that you accept the terms of the license and click "Next".

Now you will need to choose the type of Windows 7 installation. In this guide, we will consider a clean installation of Windows 7 without retaining any programs and files of the previous operating system. This is usually the best option as it doesn't leave any "garbage" from the previous installation. Click "Full installation (advanced options).

Select a drive or partition to install
In the next dialog box, you will see a prompt to select HDD or a hard disk partition on which you want to install Windows 7. Using the "Disk Setup" item, you can delete, create and format partitions on the hard disk (split the disk into two or combine two into one, for example). How to do this is described in the instructions (opens in a new window). After the necessary actions with the hard disk are completed, and the desired partition is selected, click "Next".

The process of installing Windows 7 on the computer will begin, which may take varying amounts of time. The computer may restart several times. I recommend that at the first reboot, return the boot from the hard disk to the BIOS so as not to see every time the invitation to press any key to install Windows 7. It is better to leave the disk or bootable flash drive connected until the installation is completed.

Enter your username and computer
After the Windows 7 setup program has done all the necessary operations, updated the registry entries and started the services, you will be prompted to enter a user name and computer name. They can also be entered in Russian, but I recommend using the Latin alphabet. You will then be prompted to set a password for the account. Windows entries. Here at your discretion - you can install, or you can not.

Enter Windows key 7
The next step is to enter the product key. In some cases, this step may be skipped. It is worth noting that if Windows 7 was preinstalled on your computer and the key is on the sticker, and you are installing exactly the same version of Windows 7, then you can use the key from the sticker - it will work. On the "Help me automatically protect my computer and improve Windows" screen, for novice users, I recommend choosing the "Use recommended settings" option.

The next configuration step is to set the Windows time and date settings. Everything should be clear here. I recommend unchecking the "Automatic changeover to daylight saving time and vice versa", since now this transition is not used in Russia. Click next.
If there is a network on your computer, you will be prompted to choose which network you have - Home, Public or work. If you are using wifi router to access the Internet, you can put "Home". If the ISP cable is directly connected to the computer, it is better to select "Public".

Wait until the Windows 7 settings are applied and the operating system loads. This completes the installation of Windows 7. The next important step is installation. Windows drivers 7, which I will write about in detail in the next article.
In this article, you will learn how to reinstall Windows 7 yourself. The material is designed for users who will install Windows on a computer or laptop for the first time. No matter how scary it may sound, reinstalling Windows is very simple. In the days of Windows 95 and 98, to an inexperienced person, the procedure for reinstalling the operating system could seem like a mystical rite. The person who was invited to do this was necessarily called a programmer, and was considered a guru in the computer field.
For their part, such gurus, inflating their own worth, in every possible way intimidated their clients with terrible computer terms and stories about viruses and burned-out computers. In this guide, you will see that this is not at all the case and that installing or reinstalling Windows on your laptop or computer is very simple and accessible to almost anyone who knows how to use a computer mouse.
I'll make a small disclaimer. This article will show you how to install Windows 7 yourself using a DVD. If your computer or laptop does not have a DVD drive, then you will need to install Windows from USB flash drives or from a memory card, I will talk about this in another lesson.
Before you start reinstalling Windows, read the entire article to the end, and if you have a printer, then print it.
Reinstalling Windows 7 consists of several steps:
- Preparing a computer for installing Windows 7;
- Preparing an installation disk with Windows 7;
- Setting up the BIOS of the computer to boot from a DVD;
- Windows installation 7;
Now let's go through all the steps in detail.
1. Preparing to install Windows 7
Before reinstalling Windows, you need to do a little preparation.
First you need to copy all the valuable information from the C drive. Of course, you know better, but still I’ll tell you where to look. There are not so many places where your useful information can be located on the "C:" drive, usually it's the desktop and "My Documents". It is also worth looking into the root of the "C:" drive, sometimes people in a hurry or simply out of ignorance save files there. Copy all the files you need to another drive (for example, “D:”), a DVD disc, or a flash drive.
For the future, keep in mind that it is best to store information not on the same disk partition on which the system is installed, and, of course, create backups.
If you just purchased a computer or are sure that there is no valuable information in it, then naturally you can not bother
Another point that should be considered before installing Windows is drivers for network card. If after installation it turns out that your Windows distribution did not have drivers for your network card, or for some reason they were not installed correctly, then you will find yourself without drivers and without the Internet. Therefore, download the latest drivers in advance, at least for the network card.
2. Preparing the installation disk with Windows 7
Those who already have a Windows 7 installation disc can skip this step. If you do not have such a disc, then you need to burn it or purchase it. Those who want to download Windows on the Internet, look for clean MSDN builds.
This way you protect yourself from possible errors in the operation of the installed system.
Windows 7 installation discs on the Internet are usually distributed as ".iso" disc images. Where to download I will not say. to promote their distribution is not entirely legal. I can advise, before downloading the image, read the comments to the release, problem discs are usually quickly identified in the form of a bunch of angry reviews.
At this stage, it is worth deciding which version of Windows 7 to install on your computer, 32-bit or 64-bit. I will not go into details, since a separate article can be written on this topic. Let me just say that a 64-bit system can work with the entire volume random access memory, when as 32-bit maximum uses, only about 3.25 GB. At the same time, a 64-bit system, due to 64-bit address pointers, requires more memory during operation. This increases the amount of memory used by applications.
Also, in favor of a 64-bit system, it is worth considering that when using 64-bit applications, there will be a fairly good increase in their performance.
Conclusion: a 64-bit system should be used if the amount of RAM in your computer is 4 or more gigabytes, which, in principle, for modern computer already becoming the norm.
After the image is downloaded, you need to burn it to a DVD, and you can proceed with the installation.
3. Setting up the BIOS of the computer to boot from DVD
To install Windows, it’s not enough just to insert a DVD disc into the drive, you also need to make sure that the computer starts booting from this disc when you turn it on. This is done in the BIOS. There is a BIOS in almost any computer or laptop, it stores all sorts of important settings, one of these settings is the device boot order. This setup us in this moment and interested.
In order to get into the BIOS, you need to immediately press a certain key on the keyboard when you turn on the computer. Usually, at boot, the screen says what exactly you need to press to get into the BIOS menu. Most often, this is the Delete, Esc, or F2 key. You will find out that you have entered by seeing the BIOS menu in front of you.
The most common options are:


If the attempt was unsuccessful, then reboot the computer and try again. Below are tables with possible options BIOS entry.
| BIOS manufacturer | Keys |
| ALR Advanced Logic Research, Inc. | F2, Ctrl+Alt+Esc |
| AMD (Advanced Micro Devices, Inc.) BIOS | F1 |
| AMI (American Megatrends, Inc.) BIOS | Del |
| Award BIOS | Ctrl+Alt+Esc |
| DTK (Datatech Enterprises Co.) BIOS | Esc |
| Phoenix BIOS | Ctrl+Alt+Esc, Ctrl+Alt+S, Ctrl+Alt+Ins |
| PC manufacturer | Keys |
| Acer | F1, F2, Ctrl+Alt+Esc |
| AST | Ctrl+Alt+Esc, Ctrl+Alt+Del |
| Compaq | F10 |
| CompUSA | Del |
| cybermax | Esc |
| Dell 400 | F3, F1 |
| Dell Dimension | F2, Del |
| Dell Inspiron | F2 |
| Dell Latitude | Fn+F1 |
| Dell Latitude | F2 |
| Dell Optiplex | Del, F2 |
| Dell Precision | F2 |
| eMachine | Del |
| Gateway | F1, F2 |
| HP | F1, F2 |
| IBM | F1 |
| IBM E-pro Laptop | F2 |
| IBM PS/2 | Ctrl+Alt+Ins then Ctrl+Alt+Del |
| IBM Thinkpad | from Windows: Programs > Thinkpad CFG |
| Intel Tangent | Del |
| Micron | F1, F2, or Del |
| Packard Bell | F1, F2, Del |
| Sony VAIO | F2, F3 |
| Tiger | Del |
| Toshiba | Esc, F1 |
After you have entered the BIOS, you need to find the option responsible for the boot order of devices. As a rule, these settings need to be looked for in the menu, in the name of which there is the word BOOT, of course there are other options, but as they say - "Who seeks, he will always find."
To facilitate the search, I will give a few examples of how it looks live:


The choice of the device to boot first is usually done using the arrow keys on the keyboard, but there are other ways to navigate the BIOS menu, so if you can’t figure it out, you can look at the help, which, as a rule, is visible in the BIOS.
Select your CD / DVD drive as the first boot device and exit the BIOS with all changes saved. To do this, use the Save and Exit Setup item. The computer will restart, and thus we have reached the next stage, for which, in fact, everything was started.
4 Install Windows 7
If the disc is recorded correctly and in BIOS settings are set, right, we will see such an inscription in front of us: Press any key to boot from CD or DVD, which means Press any key to boot from CD or DVD.
It looks like this:

Press any key
If you don’t have such an inscription, then you may have done something of the above written wrong. In this case, check the BIOS again to see if the boot from DVD setting is preserved, if everything is set correctly in the BIOS, then most likely your disk is not bootable and you will have to look for another installation disk or download another Windows 7 image.
At this point I will make a small disclaimer. You may come across an installation Windows disk 7, on which, in addition to Windows itself, additional utilities are recorded, in this case, to start the installation, you will need to select the desired item in the menu of your disk. It is also worth noting that in some discs, most of the operations described below will take place automatically, without your participation. Do not worry about this, all these settings can be changed, if desired, after the installation of Windows is completed.

To start the installation, click "Install"

You will be given the choice of which version of Windows to install. You need to choose the one for which you have the key. If you have a laptop, then often a sticker with a key and instructions Windows versions glued to the bottom. We will need the key itself at the end of the installation. In principle, it will be possible to introduce it not immediately, but within 30 days.

Agree to the license terms and click "Next"

Select full installation.

Select the partition where Windows 7 will be installed and click "Disk Setup"

At this point, an inexperienced person may have questions, so we will consider it in more detail.
Hard Disk Setup
Often, in addition to the partitions that you know about (such as C: D: E:, etc.), there may be one or more hidden partitions on your computer's hard drive. This is especially true for laptops that were sold with an operating system already installed. The manufacturer makes such sections in order to be able to restore the system and bring the laptop to its factory settings.
Also often found hidden section 100MB in size, it is created by Windows 7 itself. This section is used to implement the BitLocker function, this function is designed to encrypt the system partition. So, in this section there is a program that, when loaded, will decode the encrypted system partition. If you wish, you can get rid of this partition by preparing your computer's hard drive for installing Windows 7 in advance. For this, it is best to use special programs, such as Acronis Disc Director.
Let's get back to the installation.
Click "Disk Setup" and "Format"

The installer will warn you that all data from this partition will be deleted, but this is not scary for us, because we prepared for this and did it in advance backup all the information we need, so feel free to agree by clicking the "OK" button.

After finishing formatting, click "Next"

Waiting for installation to complete

After installation, you will be prompted to enter your username and computer name.


We enter the key, it can be glued to the laptop from below, or in the form of a sticker on the system unit.

Set the security mode

Set the date, time and time zone

If the computer has a network connection and the system has found a driver for your network card, Windows will prompt you to select the type of connection

This completes the installation of Windows 7, and you can proceed to install the drivers and programs you need.

Finally, do not forget to return the BIOS settings that we changed in paragraph 3 our leadership. You must set your hard drive as the first boot device in the BIOS, otherwise the computer will try to start booting from DVD every time it starts.
(209 Votes)
In some cases, it is required to install an operating Windows system 7 over the same operating OS. For example, it makes sense to perform this operation when the system is experiencing failures, but the user does not want to completely reinstall, so as not to lose the current settings, drivers, or existing programs. Let's see how this can be done.
Note: Without a good reason, it is better not to install one OS over another, as there is a chance that the problems of the old system will remain or even new ones may appear. However, there are many such cases when, after installation by this method, the computer, on the contrary, starts to work more stable, without any failures, which means that in some situations these actions can be justified.
To perform the procedure, you must have an installation flash drive or a disk with the system distribution kit. So, let's take a step-by-step look at the process of installing Windows 7 on a PC with an already operating OS with the same name.
Step 1: Prepare your computer
First of all, you need to prepare your computer to install a new OS on top of the existing Windows 7 in order to save all important settings and prepare the PC to boot from the desired device.


Step 2: Installing the OS
After the preparatory procedures have been completed, you can proceed to the direct installation of the OS.
- Insert the distribution disk into the drive or the installation USB flash drive into the USB connector and restart the PC. When restarted, the start window of the installer will open. Here specify the language, time format and keyboard layout, depending on what initial settings it will be more convenient for you to perform the installation procedure. Then click "Further".
- In the next window, click on the big button "Install".
- Next, a window with license terms will open. Without accepting them, you will not be able to carry out further installation steps. Therefore, check the appropriate checkbox and click "Further".
- The installation type selection window will open. Under normal installation conditions on a blank partition of the hard drive, you should choose the option "Full installation". But since we are installing the system on top of working Windows 7, in this case, click on the inscription "Update".
- Next, a compatibility check will be performed.
- After its completion, a window with a compatibility check report will open. It will indicate which components of the current operating system will be affected by installing another Windows 7 on top of it. If you are satisfied with the result of the report, then in this case click "Further" or "Close" to continue the installation procedure.
- Next, the system installation process will begin directly, or more precisely, its updates. It will be divided into several procedures:
- copy;
- Collection of files;
- Unpacking;
- Installation;
- Transferring files and settings.

Each of these procedures will automatically follow one another, and their dynamics can be observed using the percentage informer in the same window. In this case, the computer will be restarted several times, but user intervention is not required here.


Step 3: Post-Installation Setup
After the installation is completed, you need to take a number of steps to set up the system and enter the activation key in order to be able to work with it.
- First of all, the create window will open. account where you should in the field "Username" enter the name of the main profile. This can be either the name of the account from the system on which the installation is being performed, or a completely new option. Enter the computer name in the bottom field, but unlike the profile, use only Latin letters and numbers. After that press "Further".
- Then a window for entering a password opens. Here, if you want to increase the security of the system, you must enter the password twice, guided by the generally accepted rules for choosing a code expression. If a password has already been set on the system on top of which the installation is being performed, then it can also be used. A hint is entered in the bottommost field in case you forget a keyword. If you do not want to install a similar type of system protection, then just click "Further".
- A window will open where you will need to enter your product key. This step confuses some users who think that activation should be automatically pulled from the OS on which the installation is being performed. But this is not the case, so it is important not to lose this activation code left over from the time you purchased Windows 7. After entering the data, press "Further".
- After that, a window opens where you need to select the type of setting. If you do not understand all the intricacies of settings, then we recommend choosing the option "Use recommended settings".
- Then a window opens where you need to set up the time zone, time and date settings. After entering the required parameters, click "Further".
- Finally, the network settings window is launched. You can make it right there by entering the current parameters, or postpone it for the future by clicking "Further".
- After that, the installation and pre-configuration of the system over the existing Windows 7 will be completed. The standard "Desktop", after which you can start using the computer for its intended purpose. In this case, the main system settings, drivers and files will be saved, but various errors, if any, will be eliminated.


Installing Windows 7 on top of a working system with the same name is not much different from the standard installation method. The main difference is that when choosing the type of installation, you should stop at the option "Update". In addition, there is no need to format the hard disk. Well, it is advisable to make a backup copy of the working OS before starting the procedure, this will help to avoid any unexpected problems and provide the possibility of subsequent recovery, if necessary.
In the process, you will format local disk, which contains the current version of Windows. Simply put, before installing a new system there, you will have to erase all old data from it. The contents of the remaining disks should remain unchanged. But it is better to play it safe and first copy to the cloud or to physical media absolutely all the data from the computer that you are afraid to lose.
If paid programs are installed on your computer, do not forget to read the rules for working with licenses when reinstalling Windows in their documentation, otherwise you may lose them.
2. Create a boot disk or flash drive
If you want to install/reinstall a licensed version of Windows, make sure you have the appropriate activation key. Even if you are already using an activated system and just want to install the same version again, the old activation key may come in handy again.
- If you already have a bootable USB flash drive or disk with the version of Windows that you are going to install, you can proceed to step 3. Otherwise, you need to download the Windows image from the Internet and burn it to any of the listed media according to the instructions below.
- Decide on the version of Windows you'll be installing and make sure your computer meets its system requirements. This information can be found on the official Microsoft website or on the disc with the purchased Windows. Don't forget to also check that your computer supports bit depth. new version: 32 or 64 bits. In order not to miscalculate, you can install a version with the same bitness as your current version of Windows.
- To create a bootable USB flash drive with any way Windows found on the Web, you can use the program (with UEFI support) and proceed to step 3.
And below I will tell you how to create a boot disk or USB flash drive with an official system image using Windows 10 as an example.

3. Boot the system from a disk or flash drive
Now that you have the physical media with the desired Windows image, you need to go into the special BIOS software environment and select the disk or USB flash drive as the boot source here.

Perhaps, instead of the classic BIOS, you will see a more modern graphical interface. Moreover, even in various old BIOS versions settings may vary. But in any case, the procedure will be approximately the same: go to the boot menu, select the desired media as the source and save the changes.
After that, the computer should boot from the selected disk or flash drive.
4. Run the installation wizard
 If you did everything correctly, the Windows setup wizard will appear on the screen. Further actions do not exceed the complexity of installing an ordinary office program. You just have to follow the prompts of the system and wait until the files are unpacked. Unless you have to select a local drive to install the operating system and format it.
 Also, be ready to enter your activation key during the process. But if you reinstall an already activated one on your Windows computer 10, then the step with the key can be skipped.
After installation is complete, your computer should boot into normal operating mode.
5. Install drivers
 softotor.net
 Modern versions of Windows load drivers on their own. But if, after reinstalling the system, you notice that the video card, speakers, or anything else is not working correctly, you can use the driver autoload utility. Suitable, for example, free Driver Booster.
After completing all of the above, you can get to work. The computer must be ready.
Hello blog readers.
Almost all mobile computer users sooner or later encounter a situation where their devices need a new operating system. However, not everyone knows how it goes windows installation 7 per laptop. In the article I will try to give detailed instructions, as well as describe a few important remarks. The process will affect all aspects, from the creation of a special portable memory, and ending with the full operation of the unit.
Before proceeding directly to the process itself, I would like to show a few warnings to users whose computer knowledge is at the initial level.
So, you have a laptop on which the seventh version of the OS from Microsoft is already installed. And along with it, the device was purchased. You want a new OS, because the device has problems in terms of speed, it refuses to boot, or a virus has appeared.
It should be said right away that in this case it is better to refuse to use the following steps and use a special section on the hard drive. It will help, without a flash drive and a disk, to return the unit to the state in which the latter was bought in the store.
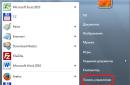
In this case, the procedure takes place almost automatically. To start the process, it is enough to press a certain key combination during the system restart. At the same time, different manufacturers offer different buttons. For example, in Asus laptops - " F9”, Toshiba-“ F8" or " F11", HP - " F10" or " F11". Details can be found on the manufacturer's website.
In addition, there are situations when users want to change the existing licensed assembly, say " Home”, to pirate, but “ Maximum". On the one hand, in this way they will receive extended functionality. But on the other hand, such decisions in the future often lead to problems, and sometimes loss of information.
It should also be said that with any new installation the best option is to save the recovery partition. Of course, if the computer was not purchased without an operating system or only with Linux or DOS. Believe me, an extra 20 GB of hard drive usually won't make a big difference. But the above area is an important element.
Disk( )
It’s worth saying right away that I have already mentioned the point about creating bootable portable memory more than once.
BIOS( )
It should be noted that in most cases it is not enough just to place a portable device in the appropriate slot. It is also necessary to make sure that the computer is the first to access exactly the section we need. This is set through BIOS - an area of \u200b\u200bthe computer in which important settings are stored. And the load order is just one of them.
So, to open the desired section, restart the device and press the " Del". On Lenovo, this can also be the " F1», « F10 or even a combination of several. Acer and Samsung also have their own meanings. It all depends on the manufacturer. They are usually indicated on the display. The main thing is not to miss this moment. If you didn’t have time, repeat until you get to the desired section.


It is worth noting that it can be different.


After you are in the BIOS, we go to the menu in which the word BOOT is present. Now we need to install our portable device in the first boot place, be it a plastic disk or a USB flash drive. Moving is done using the arrows on the keyboard. The selected action is confirmed by the button « Enter". In some versions, you can place it in the desired cell using " F5" and " F6". Hints are listed next to it.


We set the appropriate device and then click " F10”, and then confirm the action. This is how we save and exit.
Installation( )
After restarting the computer, a dark screen will appear with an inscription saying that you need to press any key to start the process from the flash drive. If you do not observe it, perhaps some movements were made incorrectly.


A window will appear in which we select the preferred language, keyboard layout and click "".


We are interested in the button Install».


Users will have a choice which build of the operating system to use. It is recommended to stop at the one from which there is a key. Since we are talking about laptops, you can look for the appropriate symbols on the sticker located on the bottom. The code itself will be needed only at the final stages of the procedure.


Now a long user agreement will appear. We read and confirm.


In the "" window, select " Complete».


A menu will appear in front of us where you need to specify the section for installation. This point is worth considering in more detail.


Disk setup( )
Often, in addition to familiar areas (C:, D:), there may be others on the computer's hard drive - usually hidden ones. This is especially true for laptops that are sold with an already installed OS. These sections are created by the manufacturer. They are designed to restore the device to factory settings.
In addition, there is a hidden area, the size of which is 100 MB. It is created by the system itself and is designed to implement the BitLocker function responsible for encryption. You can get rid of it if you wish. However, this is not recommended.


So, select the disk, and then click " Setting...". Additional features will open. Since we do not want to change anything in terms of dividing the hard drive, we simply indicate "" and confirm the action.


Important! All information will be deleted from the desired partition, including user files. If for some reason you were unable to save important documents, after the installation is completed, you can use special programs that allow you to return everything to its place even as a result of several formatting. It should be said right away that this is unlikely to help for video and music.
We are waiting for the end and press "".


The installation will begin directly.


After that, you are prompted to enter the username and computer name.


In the next menu, set the password (you can not do this by selecting "").


The key entry window will open.


Choose a security level. If desired, it can be changed in the future.