The Windows 7 operating system during installation creates hidden section, where it writes system files and information for recovery. Hidden section is not available for viewing by standard Windows tools, and hence for copying. In order to copy the hidden partition, you need to use a special program. For example, you can use Acronis Disk Director.
You will need
- - a computer;
- - the Internet;
- - Acronis Disk Director.
Instruction
Once I came to visit my friends and they asked me to transfer Windows 8.1 along with hidden partitions with hard drive laptop to solid state SSD drive. But friends had me multiple conditions:
1. After migrating to SSD from indoor partitions with factory settings should remain functional.
2. With Windows 8.1, activation should not fly off.
My friends didn't have Internet, Acronis True Image and Paragon Home Expert weren't expected either. Yes, and I had nothing with me, except for a clean 32 GB flash drive, but in an hour everything was ready.
Hello friends. I have written several articles on transferring Windows 7, 8, 8.1 from a laptop hard drive to an SSD.
Today's article describes the easiest way, you don't even have to download and install any programs on your laptop. In truth, they say that everything ingenious is simple. In the following articles, things will be a little more complicated.
- Note: read the following articles on this topic - .
- If you can’t transfer Windows 7, 8, 8.1, along with hidden partitions, from a laptop hard drive to an SSD solid-state drive, then simply.
- What to do if, after transferring Windows 8.1 from a regular hard drive to an SSD, the factory reset program stopped working on a laptop or
- If you are interested in the article, visit the special section where from one storage medium to another.
In a nutshell about what such a transfer includes, suitable even for a novice user. We will use the built-in laptop manufacturer factory reset program. We will create a recovery flash drive (you will need a blank 16 GB flash drive), or you can create recovery discs (you will need 3 blank DVDs), using a flash drive or disk we will transferWindows 7, 8, 8.1 along with hidden partitions from a laptop hard drive to an SSD solid state drive.
- In simple termsin today's article we will roll back the laptop to factory settings, but we will roll back not to HDD laptop, but on an SSD solid state drive. In the end, nand our laptop everything will work as before, but only much faster.
1. Hidden partitions with factory settings will remain functional.
2. With Windows 8.1, activation will not even fail.You can return the hard drive from the laptop back at any time, that is, you do not lose anything.
In the following articles, we will use Acronis True Image and Paragon Home Expert for migration.
The whole difficulty of transferring Windows to an SSD solid-state drive (120 GB or 240 GB) is that the SSD is probably less than the laptop hard drive (500 GB or 1 TB), and in addition to running Windows, we need to transfer hidden partitions with factory defaults to the SSD. settings, so that the ability to roll back to the factory settings is not violated. Is it possible to make such a transfer? Yes, it is possible!
What prompted me to write these articles? Of course, your numerous requests to describe the transfer of the entire contents of the laptop hard drive to SSD. At first, I had the idea to go the easy way - to find a detailed article on this topic on the net and post a link to it on my website, but after wandering through various forums, I found only "raw" thoughts on this topic that can lead an inexperienced user into a dead end.
You may ask - And what to do with a simple laptop hard drive?
After transferring to a solid state drive, the Windows 7 or Windows 8.1 operating system will work fine, the laptop factory reset program will also work, in short, everything will be the same on your laptop, only instead of a hard drive there will be an SSD solid state drive. Even if your SSD is 120 GB, then for operating system this is more than enough, but for data storage, you can use a laptop hard drive in an external box or a simple portable USB hard drive.
Many attentive users may ask - "What are hidden partitions on a laptop?"
And the question is asked correctly, if you decide on such an operation, then you should know everything about the existing partitions on your laptop's hard drive.
Before starting the transfer, let's find out all the information about the hard drive of my laptop, then go to the "Disk Management" of the operating system and I will explain everything to you.
For example, my laptop has Windows 8.1 installed. The manufacturer of my laptop is Toshiba, in the disk properties you can see the name of the hard drive manufacturer, also Toshiba.

Volumes tab. The hard drive has a standard GPT partition table layout format, you can see this on the Volumes tab. Just below you can see the hard drive capacity of 700 GB.

Disk Management window
If you have a different laptop manufacturer, then there may be a slight difference that does not affect the overall process of moving Windows to an SSD.
1. First hidden section without a letter, 1.00 GB. Healthy (partition of the original equipment manufacturer (OEM)), this is a service partition of the laptop manufacturer with a program to roll back to the factory settings. The laptop manufacturer specifically creates such a partition, in a difficult case, if your operating system does not load due to your careless actions or because of a virus, then you can roll back the laptop to the state it was at the time you bought the laptop.
2. Second hidden section, size 260 MB Healthy (Encrypted (EFI) system partition), it contains files Windows boot 8.1, also Windows 8.1 Recovery Environment files.
3. The third section has the letter C, volume 344 GB, installed operating system Windows 8. Drive C:, despite its volume of 344 GB, is filled with 80 GB files.
4. The fourth section under the letter (E:), volume 341 GB, with data files: music, movies and so on.
5. Fifth Hidden Section, no letter, 10.75 GB, Healthy (Original Equipment Manufacturer (OEM) partition), this partition contains a factory image of the operating system Windows systems 8.

Attention: If you have removedfirst hidden sectionwithout a letter, 1.00 GB andfifth hidden section, which does not have a letter, with a volume of 10.75 GB, then transfer it using the most in a simple way Windowson an SSD solid state drive will not work and here's why.
For porting, I want to use the built-inlaptop manufacturer a factory reset program called Recovery Media Creator, which works with hidden sections, returning the laptop to its factory state. And if you have deleted hidden partitions, then the programRecovery Media Creator will not work.
Create a flash drive or recovery discs
All laptop manufacturers bundle their devices with their own factory reset program. Each manufacturer has a different name for it, but they all work almost identically. For example, in Toshiba laptops, such a program is called Recovery Disc Creator or Recovery Media Creator, the Acer laptop manufacturer calls this utility, for laptops, the program is called Samsung Recovery Solution 5, for laptops, for HP laptops - HP Recovery Manager. All these programs are similar to each other and work on the same principle. So, no matter what laptop you have, you can safely use this instruction for yourself.
We connect the power adapter to the laptop so that when creating a hard disk image, the laptop does not turn off and the process is not interrupted in the middle.
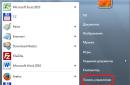
Move the mouse to the lower left corner and click the left button,


The program invites us to createResuscitator media for system recovery, that is, we can create DVD recovery discs with you, you will need several (3-5) clean DVD disc, the program will ask you to insert three DVDs one by one into the drive and the entire Windows image will be recorded on them, by the way, the whole process is described in detail in our article .
We can also create a bootable recovery flash drive, but the flash drive must be large, 16-32 GB in size.
I will choose the Kingston DataTraveler Mini flash drive , I have it in the amount of 32 GB (but 16 GB would be enough). 


Be careful, all data on the flash drive will be deleted.

OK. A recovery USB flash drive is being created.

The process of creating a bootable flash drive is completed.

Replacing a laptop hard drive with an SSD
Friends, now you need to replace the hard drive in the laptop with a solid state drive. Replacement should be no problem for you, since the form factor of a laptop hard drive and an SSD solid state drive are the same - 2.5 inches. We also have several articles on this topic.
We will also consider this issue in this article and there are no difficulties here. Usually on the back cover of a laptop there is a special hard drive bay and to remove this hatch, you just need to unscrew two screws.
The hard drive is attached to the laptop with two more screws, we also turn them off, then carefully pull the silicone tab and the hard drive is disconnected.

But on our Toshiba L50 - A - K3K laptop, there is no such compartment, which means you have to completely remove the laptop cover.
Flip the laptop over. First of all, you need to remove the battery from the laptop, but in our case this will not work, since it is also under the cover.
- Important! : The article is given to you for review, if you have never disassembled a laptop, then do it better in a service center. Before disassembling the laptop, remove battery, if it is not removable, then disconnect it from the laptop motherboard, you need to do this in any case. When you remove the hard drive, do not touch the components located on the motherboard laptop, otherwise the motherboard may fail, and it is 85-90% of the cost of the laptop.
We unscrew all the screws securing the back cover of the laptop (bottom), in my case 14 screws.


We take out the drive

and carefully remove the laptop cover, despite the fact that all the screws are unscrewed, the laptop cover is removed with a very light effort, since the cover is attached to the laptop case with plastic clips

Included in the latches on the case, neither the latches nor the clips can be broken in any way, because the cover will have to be put back.

And here is our hard drive

it is attached to the laptop case with two screws, unscrew the screws and remember exactly where the laptop hard drive was screwed to the motherboard.

Carefully disconnect the hard drive from the SATA connector.

The laptop hard drive is in a kind of sled, disconnect them.


Well, then we fix the sled on the SSD solid state drive. The form factor of the 2.5 laptop hard drive is the same as the form factor of the SSD and our SSD will fit perfectly in the place of the laptop hard drive.
Our 120GB Kingston HyperX 3K SSD


and connect it to the SATA connector on the laptop motherboard and fasten it with two screws.


We put back the laptop lid and the drive, do it carefully, the clips on the lid should fit into the plastic latches on the case.
We turn on the laptop, press F2 or Del when loading and enter the BIOS, as we see our SSD is perfectly defined in the BIOS, which means you can work with it.

Deploying Windows 8.1 from a recovery flash drive to an SSD
We connect our Kingston DataTraveler Mini 3.0 32GB recovery flash drive and reboot, when loading the laptop, press F2 and enter the BIOS. If you have a UEFI BIOS, then set the Secure Boot option to Disabled.

We do not touch Boot Mode and leave it in the UEFI Boot position,

Then we change the boot priority to a USB flash drive or just press F12, enter the boot menu of the laptop, select our USB flash drive and press Enter, the laptop boots from the recovery flash drive.

The Toshiba Recovery Wizard laptop factory settings window appears, select the first item and click Next.


Select the first item "Restore software factory default" and click Next.


Recovery process starts


We accept the terms of the license


Use default options

If you have a Microsoft account, then enter its details. If a account Microsoft does not, then create a simple local account.

That's all

Windows 8.1 boots and runs normally

We enter Disk Management and see ourSSD Kingston HyperX 3K, 120 GB.
Please note that the volume label C: has remained the same, but it does not interfere with us, and if anything, it can be changed.

In the properties of the disk, you can see the name of the hard drive manufacturer

Volumes tab. The hard disk has the GPT partition table format standard.
Hard disk capacity 120 GB.

Conclusion
On our laptop, everything works as before, but noticeably faster.
1. Hidden partitions with factory settings are quite functional.
2. With Windows 8.1, activation did not even fly off.
3. You can return the hard drive from the laptop back at any time, that is, you do not lose anything.

The only negative is that you will have to install all the programs on the laptop, because in fact, in today's article we rolled back the laptop to the factory settings, but rolled back not to the laptop's hard drive, but to the SSD solid-state drive.
Once I came to visit my friends and they asked me to transfer Windows 8.1, along with hidden partitions, from a laptop hard drive to an SSD solid state drive. But friends had me multiple conditions:
1. After migrating to SSD from indoor partitions with factory settings should remain functional.
2. With Windows 8.1, activation should not fly off.
My friends didn't have Internet, Acronis True Image and Paragon Home Expert weren't expected either. Yes, and I had nothing with me, except for a clean 32 GB flash drive, but in an hour everything was ready.
Hello friends. I have written several articles on transferring Windows 7, 8, 8.1 from a laptop hard drive to an SSD.
Today's article describes the easiest way, you don't even have to download and install any programs on your laptop. In truth, they say that everything ingenious is simple. In the following articles, things will be a little more complicated.
- Note: read the following articles on this topic - .
- If you can’t transfer Windows 7, 8, 8.1, along with hidden partitions, from a laptop hard drive to an SSD solid-state drive, then simply.
- What to do if, after transferring Windows 8.1 from a regular hard drive to an SSD, the factory reset program stopped working on a laptop or
- If you are interested in the article, visit the special section where from one storage medium to another.
In a nutshell about what such a transfer includes, suitable even for a novice user. We will use the built-in laptop manufacturer factory reset program. We will create a recovery flash drive (you will need a blank 16 GB flash drive), or you can create recovery discs (you will need 3 blank DVDs), using a flash drive or disk we will transferWindows 7, 8, 8.1 along with hidden partitions from a laptop hard drive to an SSD solid state drive.
- In simple termsin today's article, we will roll back the laptop to the factory settings, but we will roll back not to the laptop's hard drive, but to the SSD solid state drive. In the end, nand our laptop everything will work as before, but only much faster.
1. Hidden partitions with factory settings will remain functional.
2. With Windows 8.1, activation will not even fail.You can return the hard drive from the laptop back at any time, that is, you do not lose anything.
In the following articles, we will use Acronis True Image and Paragon Home Expert for migration.
The whole difficulty of transferring Windows to an SSD solid-state drive (120 GB or 240 GB) is that the SSD is probably less than the laptop hard drive (500 GB or 1 TB), and in addition to running Windows, we need to transfer hidden partitions with factory defaults to the SSD. settings, so that the ability to roll back to the factory settings is not violated. Is it possible to make such a transfer? Yes, it is possible!
What prompted me to write these articles? Of course, your numerous requests to describe the transfer of the entire contents of the laptop hard drive to SSD. At first, I had the idea to go the easy way - to find a detailed article on this topic on the net and post a link to it on my website, but after wandering through various forums, I found only "raw" thoughts on this topic that can lead an inexperienced user into a dead end.
You may ask - And what to do with a simple laptop hard drive?
After transferring to a solid state drive, the Windows 7 or Windows 8.1 operating system will work fine, the laptop factory reset program will also work, in short, everything will be the same on your laptop, only instead of a hard drive there will be an SSD solid state drive. Even if your SSD is 120 GB, then this is more than enough for the operating system, but for data storage, you can use a laptop hard drive in an external box or a simple portable USB hard drive.
Many attentive users may ask - "What are hidden partitions on a laptop?"
And the question is asked correctly, if you decide on such an operation, then you should know everything about the existing partitions on your laptop's hard drive.
Before starting the transfer, let's find out all the information about the hard drive of my laptop, then go to the "Disk Management" of the operating system and I will explain everything to you.
For example, my laptop has Windows 8.1 installed. The manufacturer of my laptop is Toshiba, in the disk properties you can see the name of the hard drive manufacturer, also Toshiba.
Volumes tab. The hard drive has a standard GPT partition table layout format, you can see this on the Volumes tab. Just below you can see the hard drive capacity of 700 GB.
Disk Management window
If you have a different laptop manufacturer, then there may be a slight difference that does not affect the overall process of moving Windows to an SSD.
1. First hidden section without a letter, 1.00 GB. Healthy (partition of the original equipment manufacturer (OEM)), this is a service partition of the laptop manufacturer with a program to roll back to the factory settings. The laptop manufacturer specifically creates such a partition, in a difficult case, if your operating system does not load due to your careless actions or because of a virus, then you can roll back the laptop to the state it was at the time you bought the laptop.
2. Second hidden section, size 260 MB Healthy (Encrypted (EFI) system partition), it contains Windows 8.1 boot files, as well as Windows 8.1 recovery environment files.
3. The third section has the letter C, volume 344 GB, installed operating system Windows 8. Drive C:, despite its volume of 344 GB, is filled with 80 GB files.
4. The fourth section under the letter (E:), volume 341 GB, with data files: music, movies and so on.
5. Fifth Hidden Section, letterless, 10.75 GB, Healthy (OEM Partition), this partition contains a factory image of the Windows 8 operating system.
Attention: If you have removedfirst hidden sectionwithout a letter, 1.00 GB andfifth hidden section, which does not have a letter, with a volume of 10.75 GB, then transfer it using the simplest method described below Windowson an SSD solid state drive will not work and here's why.
For porting, I want to use the built-inlaptop manufacturer a factory reset program called Recovery Media Creator, which works with hidden sections, returning the laptop to its factory state. And if you have deleted hidden partitions, then the programRecovery Media Creator will not work.
Create a flash drive or recovery discs
All laptop manufacturers bundle their devices with their own factory reset program. Each manufacturer has a different name for it, but they all work almost identically. For example, in Toshiba laptops, such a program is called Recovery Disc Creator or Recovery Media Creator, the Acer laptop manufacturer calls this utility, for laptops, the program is called Samsung Recovery Solution 5, for laptops, for HP laptops - HP Recovery Manager. All these programs are similar to each other and work on the same principle. So, no matter what laptop you have, you can safely use this instruction for yourself.
We connect the power adapter to the laptop so that when creating a hard disk image, the laptop does not turn off and the process is not interrupted in the middle.
Move the mouse to the lower left corner and click the left button,
The program invites us to createResuscitator media for system recovery, that is, we can create DVD recovery discs with you, you will need several (3-5) blank DVD discs, the program will ask you to insert three DVD discs one by one into the drive and the entire Windows image will be written to them, by the way , the whole process is described in detail in our article .
We can also create a bootable recovery flash drive, but the flash drive must be large, 16-32 GB in size.
I will choose the Kingston DataTraveler Mini flash drive , I have it in the amount of 32 GB (but 16 GB would be enough).
Be careful, all data on the flash drive will be deleted.
OK. A recovery USB flash drive is being created.
The process of creating a bootable flash drive is completed.
Replacing a laptop hard drive with an SSD
Friends, now you need to replace the hard drive in the laptop with a solid state drive. Replacement should be no problem for you, since the form factor of a laptop hard drive and an SSD solid state drive are the same - 2.5 inches. We also have several articles on this topic.
We will also consider this issue in this article and there are no difficulties here. Usually on the back cover of a laptop there is a special hard drive bay and to remove this hatch, you just need to unscrew two screws.
The hard drive is attached to the laptop with two more screws, we also turn them off, then carefully pull the silicone tab and the hard drive is disconnected.
But on our Toshiba L50 - A - K3K laptop, there is no such compartment, which means you have to completely remove the laptop cover.
Flip the laptop over. First of all, you need to remove the battery from the laptop, but in our case this will not work, since it is also under the cover.
- Important! : The article is given to you for review, if you have never disassembled a laptop, then do it better in a service center. Before disassembling the laptop, remove the battery, if it is not removable, then disconnect it from the laptop motherboard, you need to do this in any case. When you remove the hard drive, do not touch the components located on the laptop motherboard with your hands and a screwdriver, otherwise the motherboard may fail, and it makes up 85-90% of the cost of the laptop.
We unscrew all the screws securing the back cover of the laptop (bottom), in my case 14 screws.
We take out the drive
and carefully remove the laptop cover, despite the fact that all the screws are unscrewed, the laptop cover is removed with a very light effort, since the cover is attached to the laptop case with plastic clips
Included in the latches on the case, neither the latches nor the clips can be broken in any way, because the cover will have to be put back.
And here is our hard drive
it is attached to the laptop case with two screws, unscrew the screws and remember exactly where the laptop hard drive was screwed to the motherboard.
Carefully disconnect the hard drive from the SATA connector.
The laptop hard drive is in a kind of sled, disconnect them.
Well, then we fix the sled on the SSD solid state drive. The form factor of the 2.5 laptop hard drive is the same as the form factor of the SSD and our SSD will fit perfectly in the place of the laptop hard drive.
Our 120GB Kingston HyperX 3K SSD
and connect it to the SATA connector on the laptop motherboard and fasten it with two screws.
We put back the laptop lid and the drive, do it carefully, the clips on the lid should fit into the plastic latches on the case.
We turn on the laptop, press F2 or Del when loading and enter the BIOS, as we see our SSD is perfectly defined in the BIOS, which means you can work with it.
Deploying Windows 8.1 from a recovery flash drive to an SSD
We connect our Kingston DataTraveler Mini 3.0 32GB recovery flash drive and reboot, when loading the laptop, press F2 and enter the BIOS. If you have a UEFI BIOS, then set the Secure Boot option to Disabled.
We do not touch Boot Mode and leave it in the UEFI Boot position,
Then we change the boot priority to a USB flash drive or just press F12, enter the boot menu of the laptop, select our USB flash drive and press Enter, the laptop boots from the recovery flash drive.
The Toshiba Recovery Wizard laptop factory settings window appears, select the first item and click Next.
Select the first item "Restore factory default software" and click Next.
Recovery process starts
We accept the terms of the license
Use default options
If you have a Microsoft account, then enter its details. If you don't have a Microsoft account, then create a simple local account.
That's all
Windows 8.1 boots and runs normally
We enter Disk Management and see ourSSD Kingston HyperX 3K, 120 GB.
Please note that the volume label C: has remained the same, but it does not interfere with us, and if anything, it can be changed.
In the properties of the disk, you can see the name of the hard drive manufacturer
Volumes tab. The hard disk has the GPT partition table format standard.
Hard disk capacity 120 GB.
Conclusion
On our laptop, everything works as before, but noticeably faster.
1. Hidden partitions with factory settings are quite functional.
2. With Windows 8.1, activation did not even fly off.
3. You can return the hard drive from the laptop back at any time, that is, you do not lose anything.
The only negative is that you will have to install all the programs on the laptop, because in fact, in today's article we rolled back the laptop to the factory settings, but rolled back not to the laptop's hard drive, but to the SSD solid-state drive.